
Derek Robertson's Passion
My wife decided years ago that there wasn't enough room in the house for any more planes, and I was forced to agree with her. That was until I came across a U-tube video of a chap who'd built a fairly sizeable pusher prop version of the Blackburn Buccaneer out of depron foam and flew it very successfully, as the video's clearly demonstrated. I was intrigued and duly read through his build blog. Fascinating stuff, no actual plan, but from an enlarged 3 view drawing he put the Buccaneer together in a very short space of time. It all looked so wonderfully simple to do and with an AUW of only 4.7lbs for a 53" span model, success was assured!
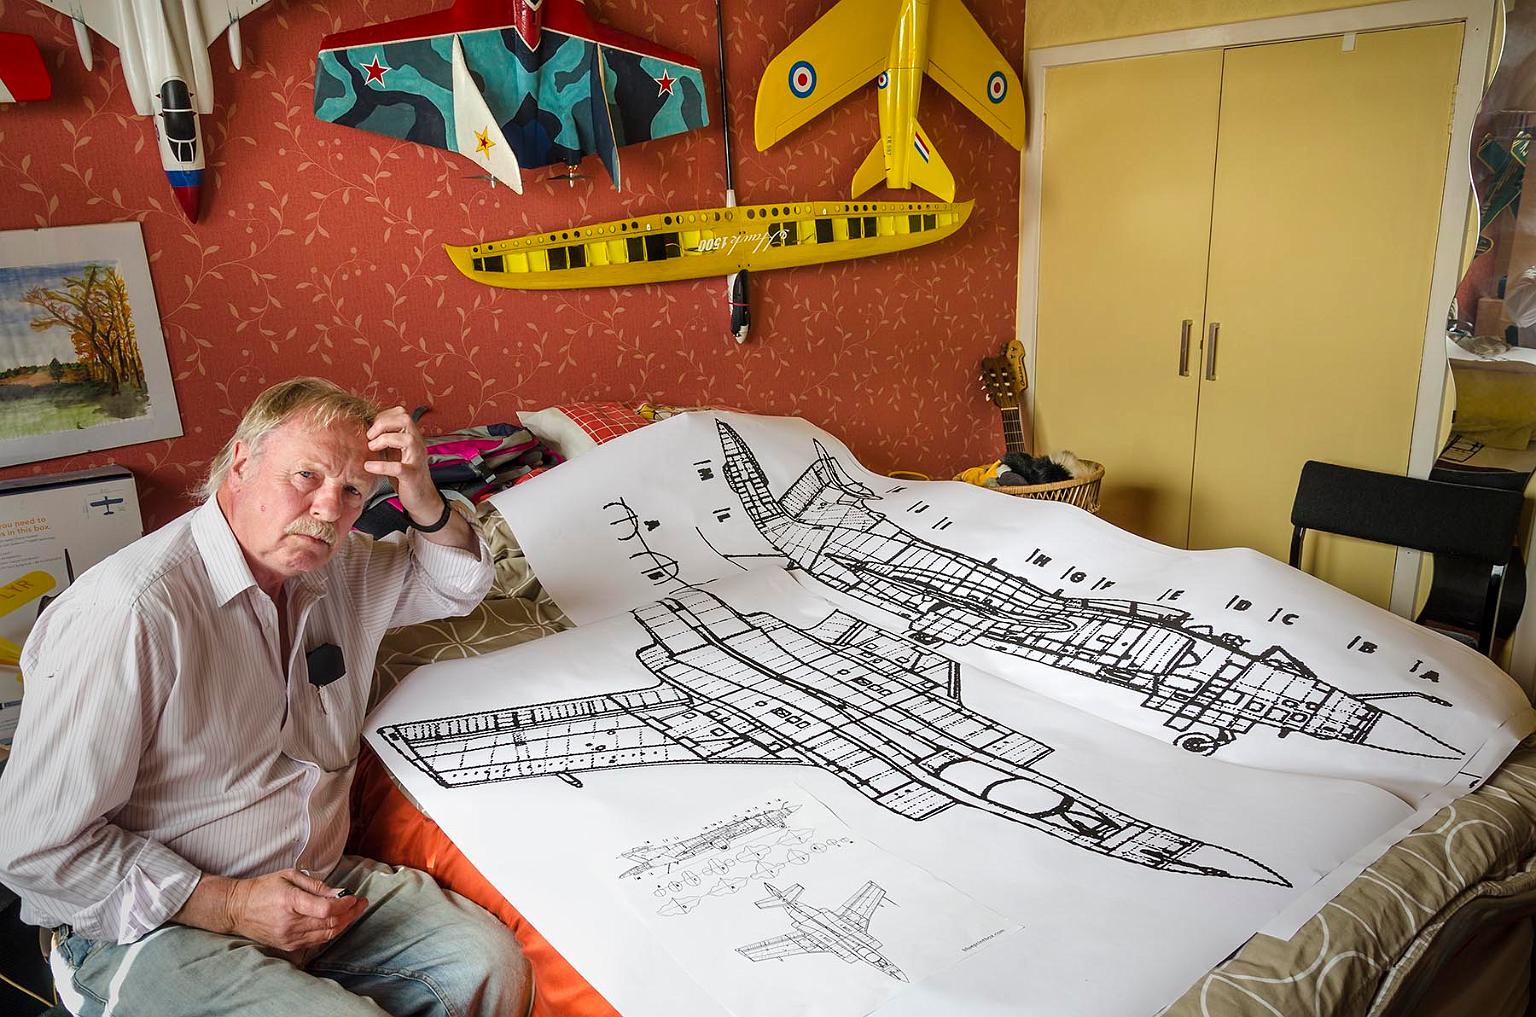
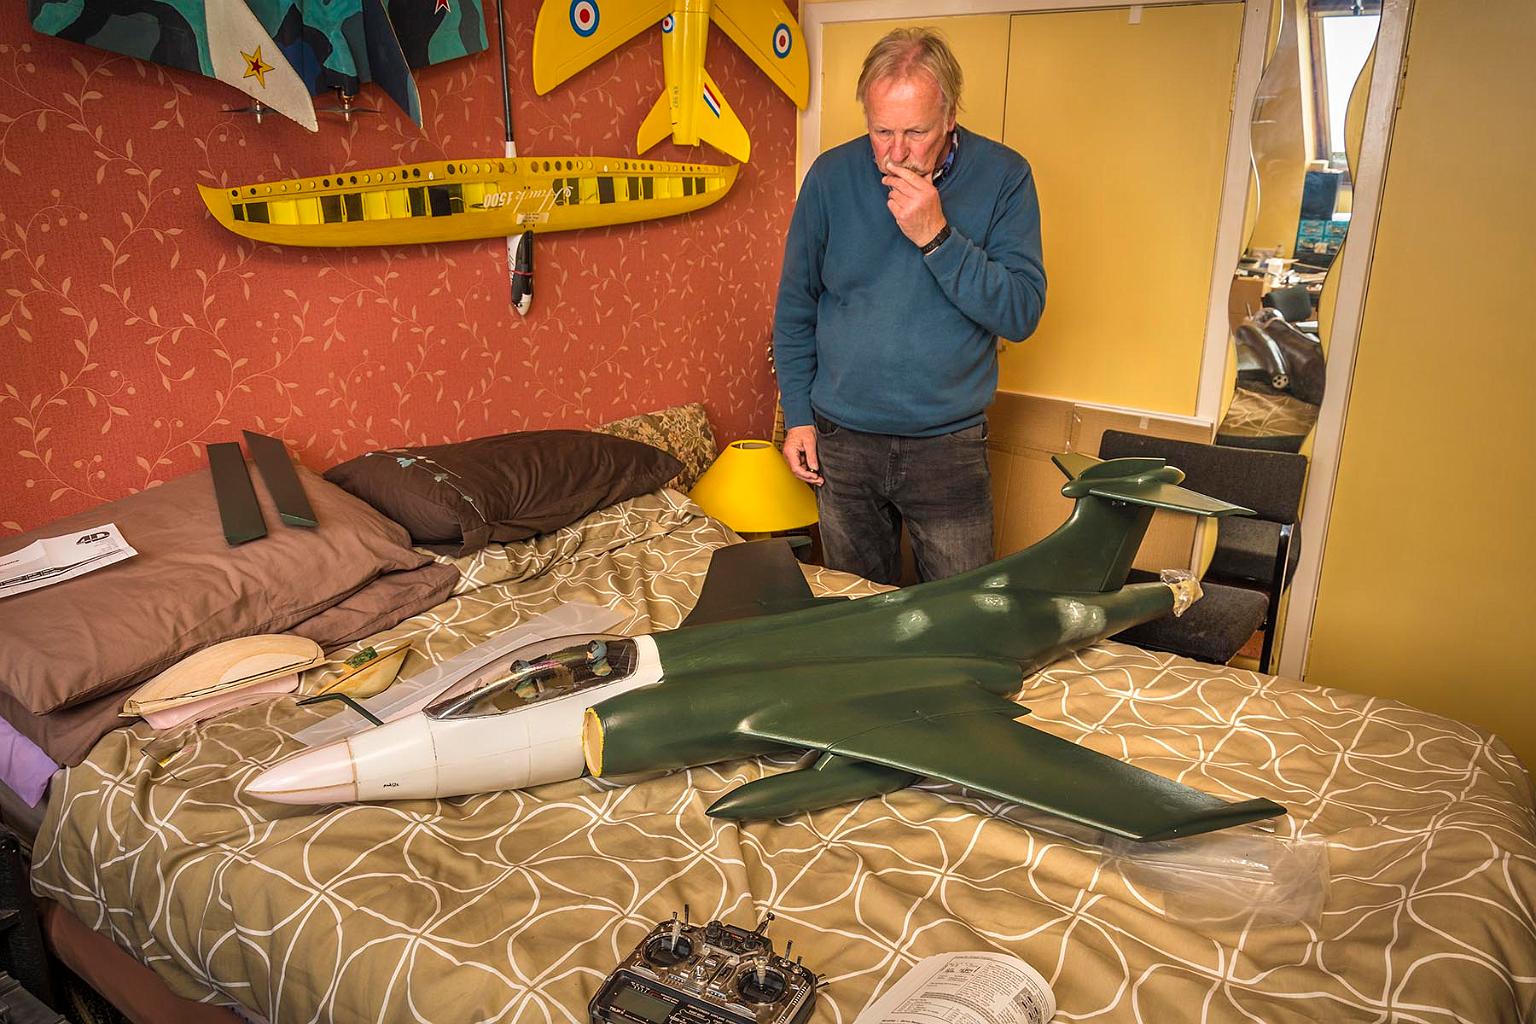
A puzzled old-timer with the original A3 print and the enlarged plan which is sitting on a standard double bed; even the wife would notice that this thing looks huge, so I could be in for a tongue-lashing!
The first thing to do was "smother" my wife with chocolates and gin (why bother with the sweets & drink you may ask? Well, she's bigger than me and I don't think I could hold the pillow in place long enough!), but eventually I persuaded her to accept one last, little, foam model, to add to the house collection.
So, things kicked off in September 2017 with the downloading of a 3 view drawing of the Buccaneer, complete with some all important fuselage profiles, that I printed onto a sheet of A3 paper. This was as big as my printer would go, and as I didn't fancy doing it in sections that required taping together, I took the A3 plan along to the Staples shop on Bedford Road ()now closed down), who charged me a mere £12 for an enlargement giving a finished wingspan of 45 inches. Why a finished size of a 45 inch span you may ask? "Simples" -- this was the biggest it could be in order to slip straight into the back of the car as a complete model. I hate having to spent time assembling models at the flying field!
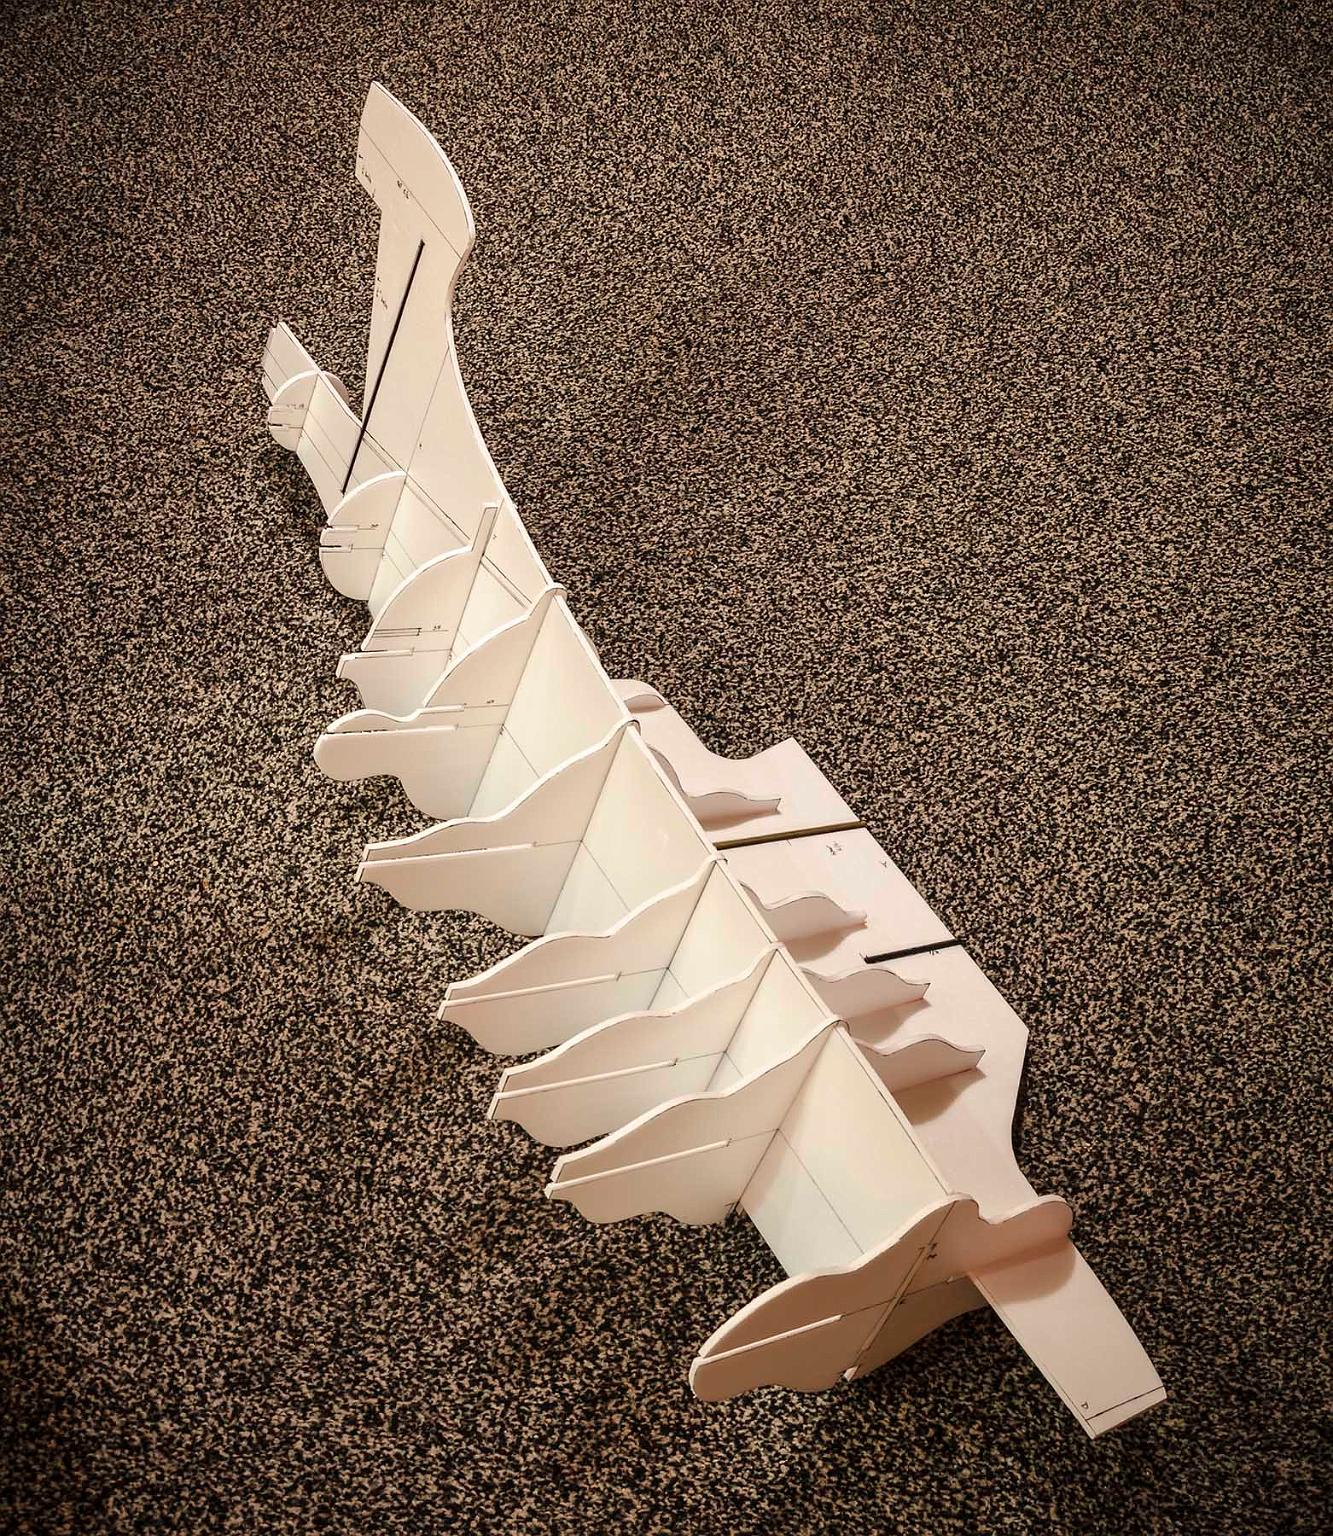
Much thought went into the build prior to construction which started early in 2018. First job was to cut out the plan form and side elevations of the fuselage, along with a complete set of fuz formers (13 in total), from 6 mm depron sheet. The nose section & wings were cut from the same material but built as separate parts. I was fortunate enough to acquire all my depron requirements from Graham Donaldson, who had plenty left over from his seaplane project, so that saved a lot of hassle with postage (cheers Graham!). Cutting the depron is a piece of cake, so it didn't take long to rustle up the fuz skeleton, which all slotted together nicely before being bonded with epoxy
 It didn't
take too long before I had the entire Bucc shape put together (minus the horizontal tail
surface), which was big and very light. The wings are 6 mm sheet with half ribs glued top and
bottom, and balsa leading / trailing edges. The only other wood used was liteply formers at
the detachable nose section, motor mount at the rear, and servo mounting locations. At this
point weight didn't seem to be a consideration, but other depron builders I had looked at all
recommended drilling lightening holes, so this I did too. Easy peasy with sharpened brass
tubes and took no time at all. Would have been even quicker if I hadn't kept stopping to top
up my wine glass!
It didn't
take too long before I had the entire Bucc shape put together (minus the horizontal tail
surface), which was big and very light. The wings are 6 mm sheet with half ribs glued top and
bottom, and balsa leading / trailing edges. The only other wood used was liteply formers at
the detachable nose section, motor mount at the rear, and servo mounting locations. At this
point weight didn't seem to be a consideration, but other depron builders I had looked at all
recommended drilling lightening holes, so this I did too. Easy peasy with sharpened brass
tubes and took no time at all. Would have been even quicker if I hadn't kept stopping to top
up my wine glass!
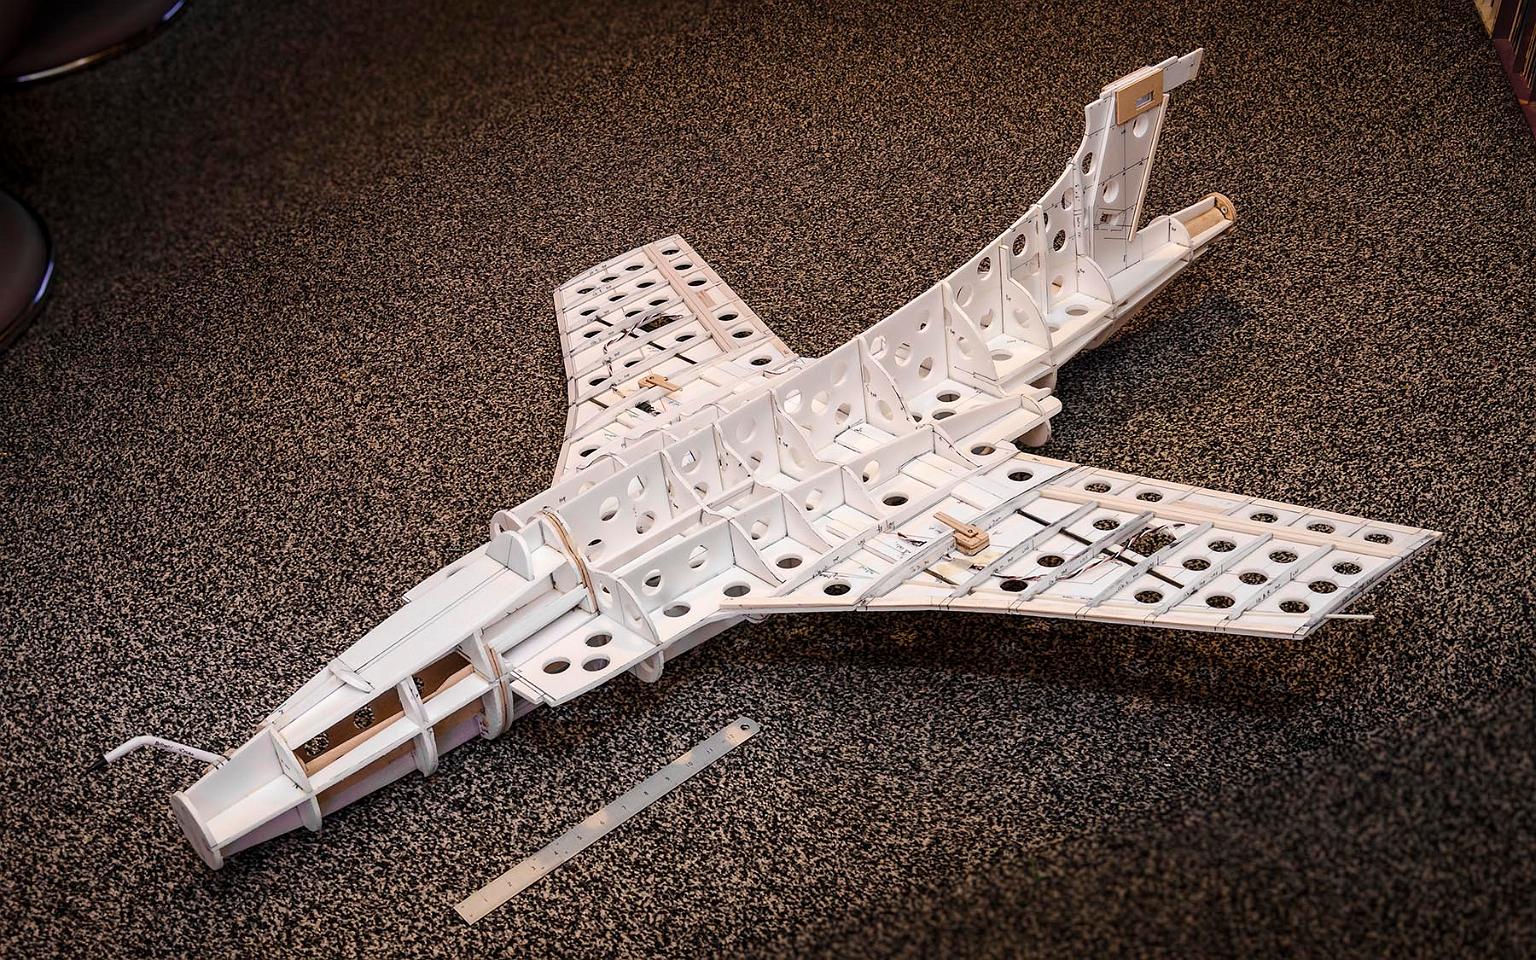
 Things kind
of ground to a halt here, and I can't remember why, but it was a wee while before I got
around to the skinning process. I had worked out the CG using the Gordon Whitehead formula,
which takes into account the tail area and moment arm, so with this marked on the skeleton
all the "gear" was attached and a check made. I was encouraged because the CG was only a
whisker rearward. So, at last I was ready to tackle the fiddly bit, covering the whole
structure with 3mm depron. Boy oh boy was this a slow process - cue lots of bad language and
countless glasses of wine! I was hoping that I could skin the fuselage with large pieces to
save time, but had to resort to smaller individual panels, each of which had to be trimmed to
an exact fit before gluing with UHU Por contact adhesive. Fortunately the 3mm depron was very
pliable and would form modest double curvatures with ease. I drank less wine whilst working
on the wings and tailplane; mercifully they were covered with a single sheet top and bottom!
I also decided to add wing tanks of depron / pink foam, with a central liteply former which
hooks onto the wing joiners at the wing / fuz joint.
Things kind
of ground to a halt here, and I can't remember why, but it was a wee while before I got
around to the skinning process. I had worked out the CG using the Gordon Whitehead formula,
which takes into account the tail area and moment arm, so with this marked on the skeleton
all the "gear" was attached and a check made. I was encouraged because the CG was only a
whisker rearward. So, at last I was ready to tackle the fiddly bit, covering the whole
structure with 3mm depron. Boy oh boy was this a slow process - cue lots of bad language and
countless glasses of wine! I was hoping that I could skin the fuselage with large pieces to
save time, but had to resort to smaller individual panels, each of which had to be trimmed to
an exact fit before gluing with UHU Por contact adhesive. Fortunately the 3mm depron was very
pliable and would form modest double curvatures with ease. I drank less wine whilst working
on the wings and tailplane; mercifully they were covered with a single sheet top and bottom!
I also decided to add wing tanks of depron / pink foam, with a central liteply former which
hooks onto the wing joiners at the wing / fuz joint.
By the way, Jim Jamieson provided me with the semi-symmetrical wing rib profiles that he'd used with great success, on his Sea Vixen, so that saved me a bit of head scratching.
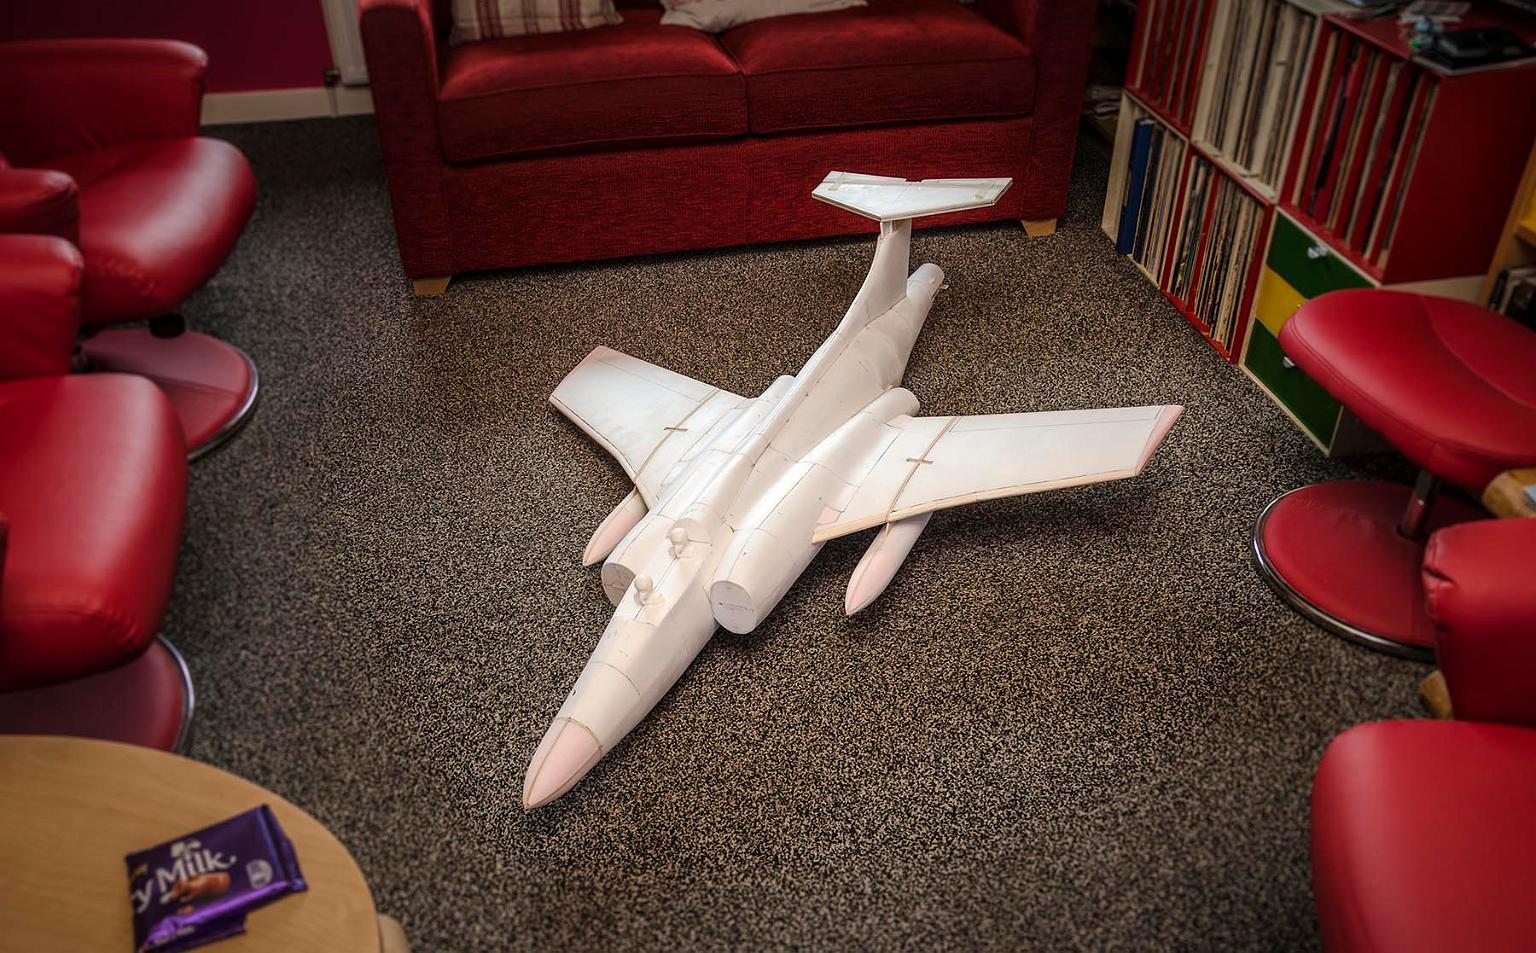
It's now nearing the end of 2018 and if this build goes on much longer I'm convinced I'll become an alcoholic! However, the end was in sight as the first coat of paint is applied. A check on the AUW weight prior to the painting was a shocking 5.75lbs. This was a bolt out of the blue and much higher than the 4lbs I had estimated. I still don't understand where the extra pound or so have come from, but with this in mind I decided not to glass or cover with brown paper but just go for applying a few coats of Easykote straight onto the foam skins, in order to avoid adding any more weight.
 I couldn't find a commercially made canopy that would fit, so eventually got around to
moulding my own. Not a brilliant job, but passable.
I couldn't find a commercially made canopy that would fit, so eventually got around to
moulding my own. Not a brilliant job, but passable.
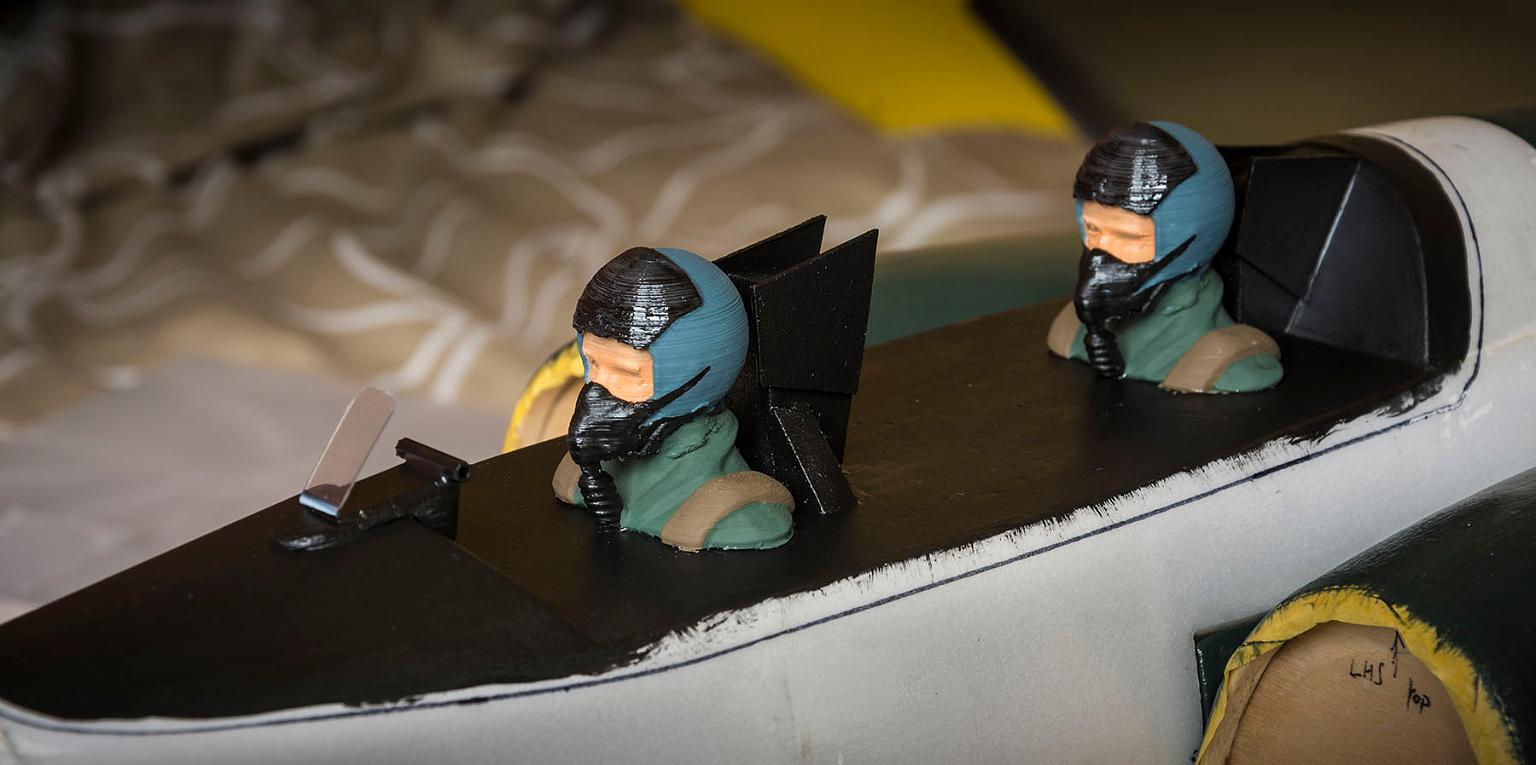
Brian Cullen made a superb job of 3D printing my crew
Just going back to the paint job itself, that was another senior moment! I had been looking on the web for a suitable scheme for the Buccaneer, and chanced upon a 1/48th scale display model with special RAF 208 Squadron 75th anniversary colours - bottle green all over with pale blue and yellow chevrons and full colour roundrels - looked lovely, so I went with that. It was only after painting I discovered a actual photo of the real aircraft, and bugger me it wasn't green after all, but BLACK! My version looked affa bonnie, so (through pure laziness) I decided just to leave it as it was. Hey-ho, slap dash or what?Does it fly mister? Well aye; eventually! It languished up in the bedroom from November 2018 until March 2019, awaiting a suitable opportunity to test fly it. I had built in a tow hook (for a bungee assist) and launch holes in the underside for a hand chuck, the idea being (because of the additional weight) that I'd bung it off Brimmond and get some wind assist off the slope. However, ideal conditions were elusive and we've now lost the use of Brimmond, so it was a hand launch at Kerloch whether I liked it or not. The long and the short of it is that I got Jim Jamieson roped in to take the tranny and I would do the sprint and chuck bit!
So the 18th of March was it's first outing and almost it's last! It reared up almost vertically from the launch, but Jim was up to the job and had it tamed, although it was obvious that the CG was still too far back. Eventually, with another 6ozs of lead in the nose, and an AUW of just over 6 lbs, she now flies fine. In fact it grooves along nicely with a decent glide angle when the motor is shut down. However the launch and to a lesser degree, the landings are still problematic with the bit in between absolutely delightful. A work in progress then, but encouraging!

Oh, I almost forgot to mention that in the ensuing period I had changed my car, only to discover that the tailgate on the "new wheels" was a good 2 inches narrower than the previous model, so fitting the fully assembled Buccaneer into the back is still just possible, but requires the skill of a contortionist to get the bloody thing in! What else could possibly go wrong?
Derek Robertson
Photos Derek Robertson / Brian Cullen
click on left or right of picture to move through
slides
click off picture to return to this page